Starting guide
Before starting the “Computer Tools for Linguistic Research” course, each student needs to take a few steps that will prepare the necessary tools for further work.
Check you have everything you need
We assume that after completing the “Programming for Linguists” course, you have:
Python interpreter
Git version control system
Development environment Visual Studio Code
GitHub account
If you do not have any of these, go back to steps 1-5 from Подготовка к прохождению курса.
Fork the repository
To fork a repository on the Github, follow these steps:
Open the repository site that your lecturer has sent you.
In the upper right corner click
Fork.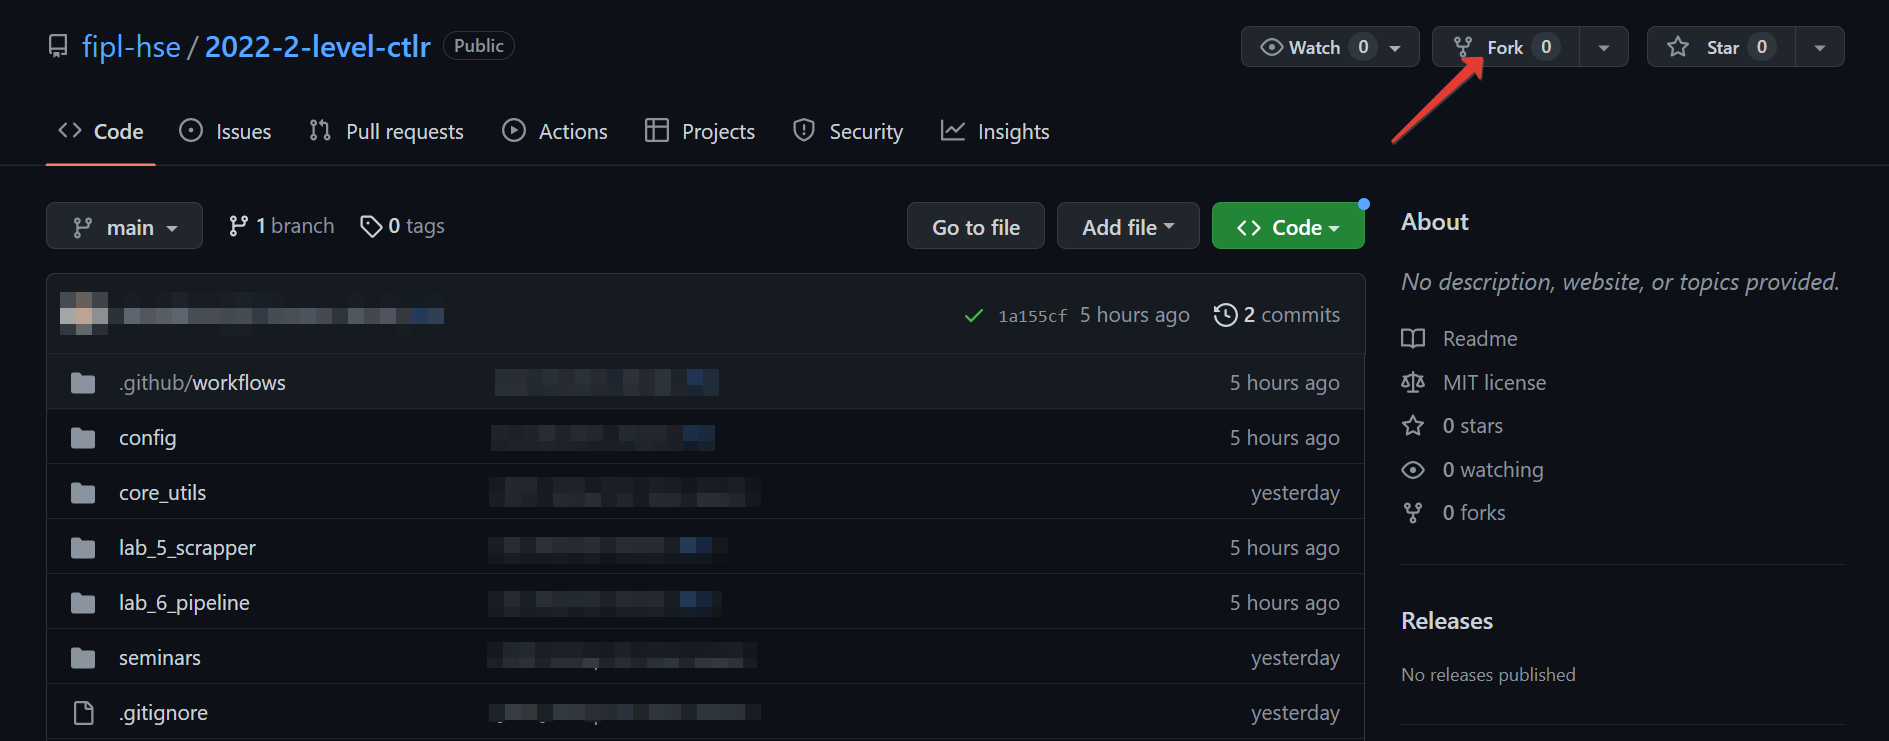
Click
Create Fork.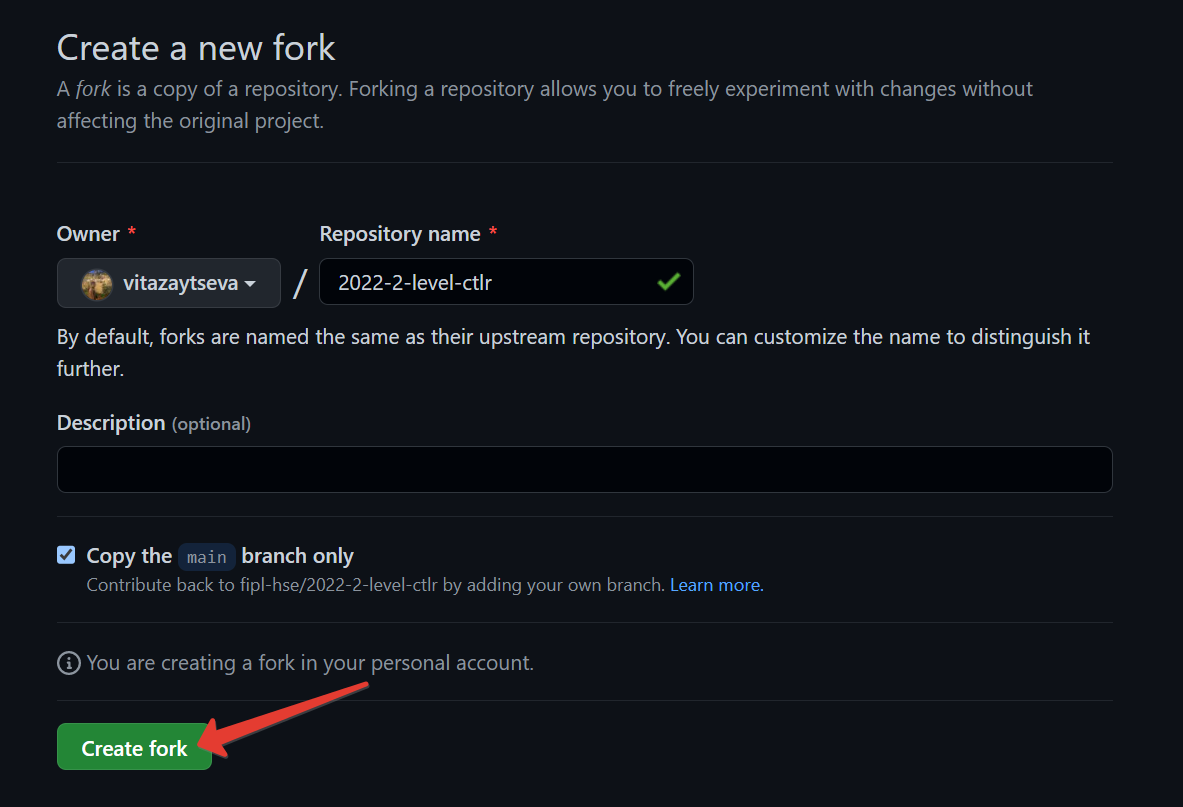
You have forked a repository! Pay attention to the link in the address
bar of the browser: it should contain your Github username and the name
of the repository: https://github.com/<your-username>/202X-2-level-ctlr.

Add collaborators
Only you can make changes to your fork. However, during the course, your mentors will need to make changes to your fork: add changes from the main fork, resolve conflicts, etc. You should add them to collaborators, so they have such an opportunity.
To do this, follow these steps:
Open the fork site you created in the Fork the repository step.
NB: Pay attention to the link in the address bar of the browser: it should contain your Github username and the name of the repository.
Click
Settings.

Select
Collaboratorsfrom the left menu.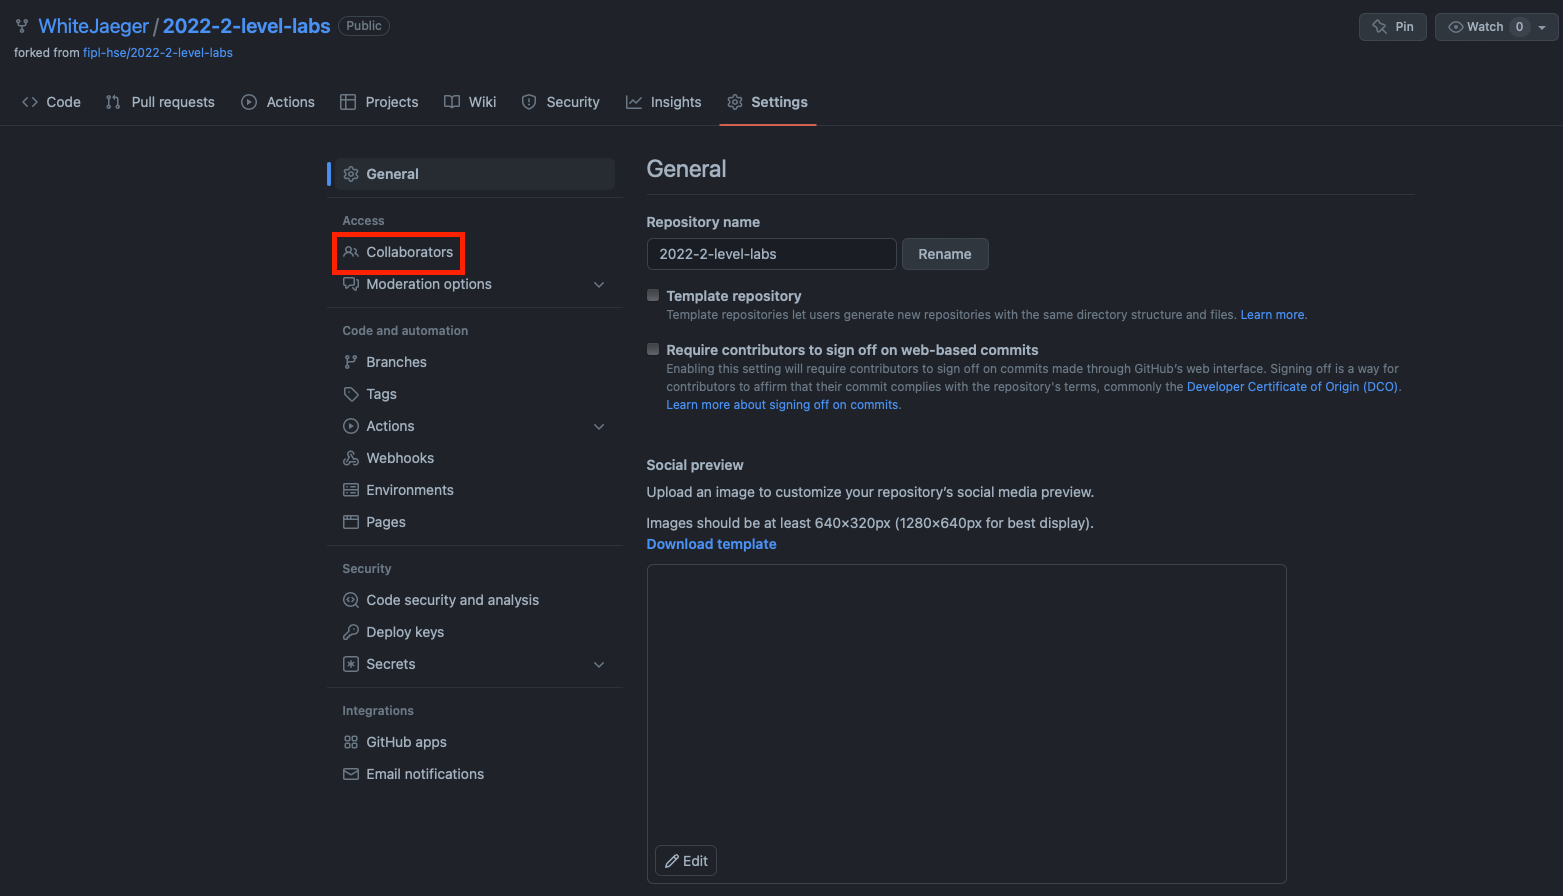
Click
Add people.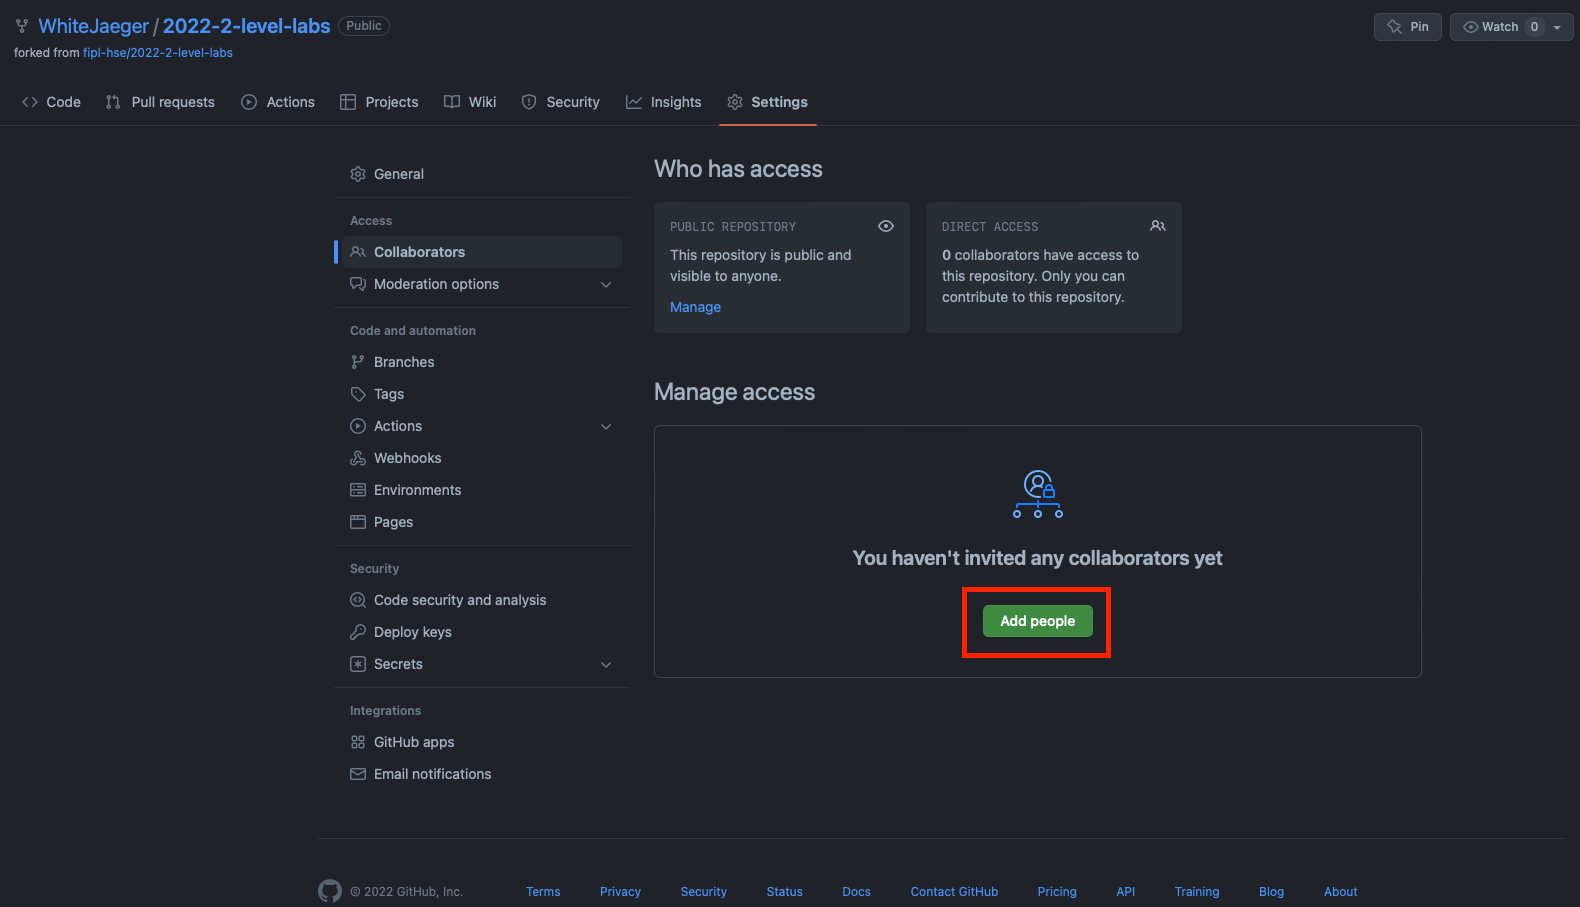
Enter your mentor’s GitHub username, select it from the list, and click
Add <github-username> to this repository.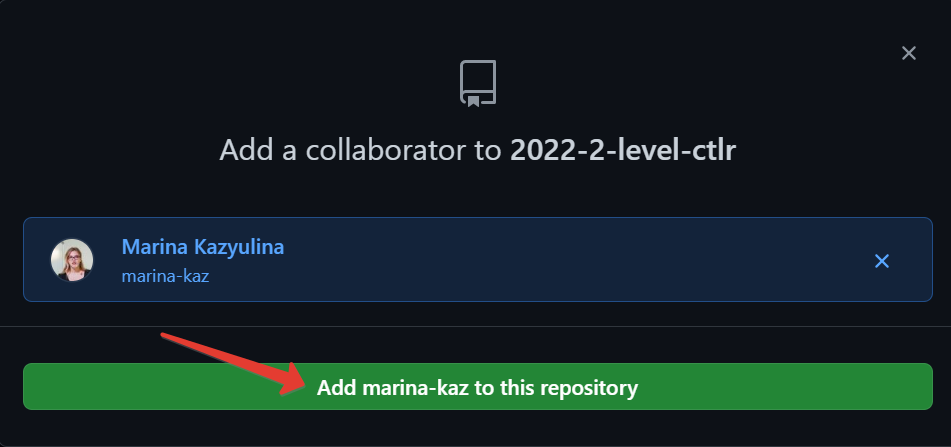
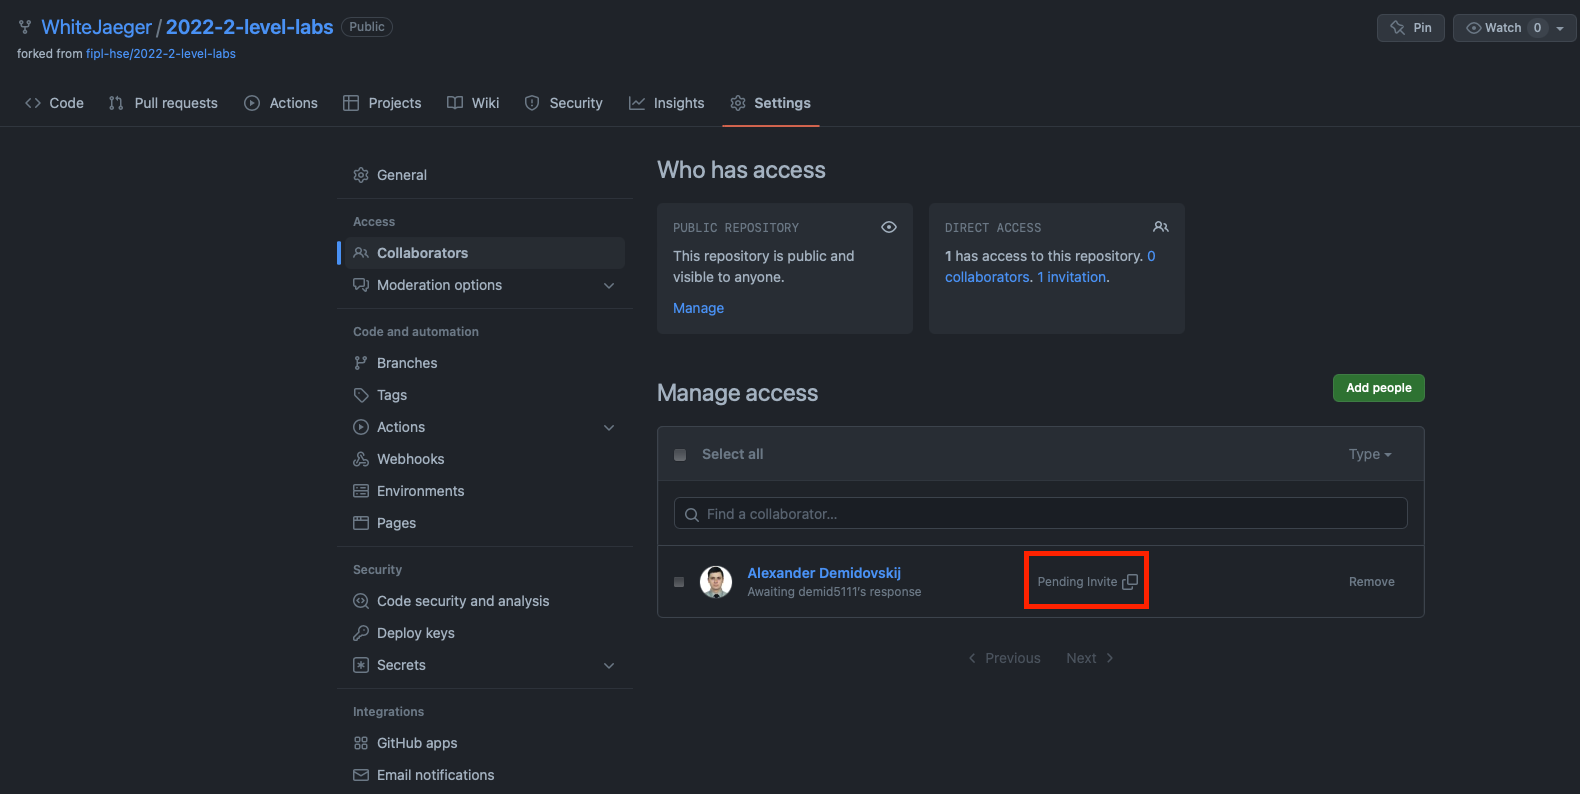
You have sent your mentor a request to be added to the collaborators! Write to them so they can accept your request.
Clone a fork of the repository to work locally
To clone a fork to work locally, follow these steps:
Open your fork’s website.
Click
Code, selectHTTPSand click the copy button.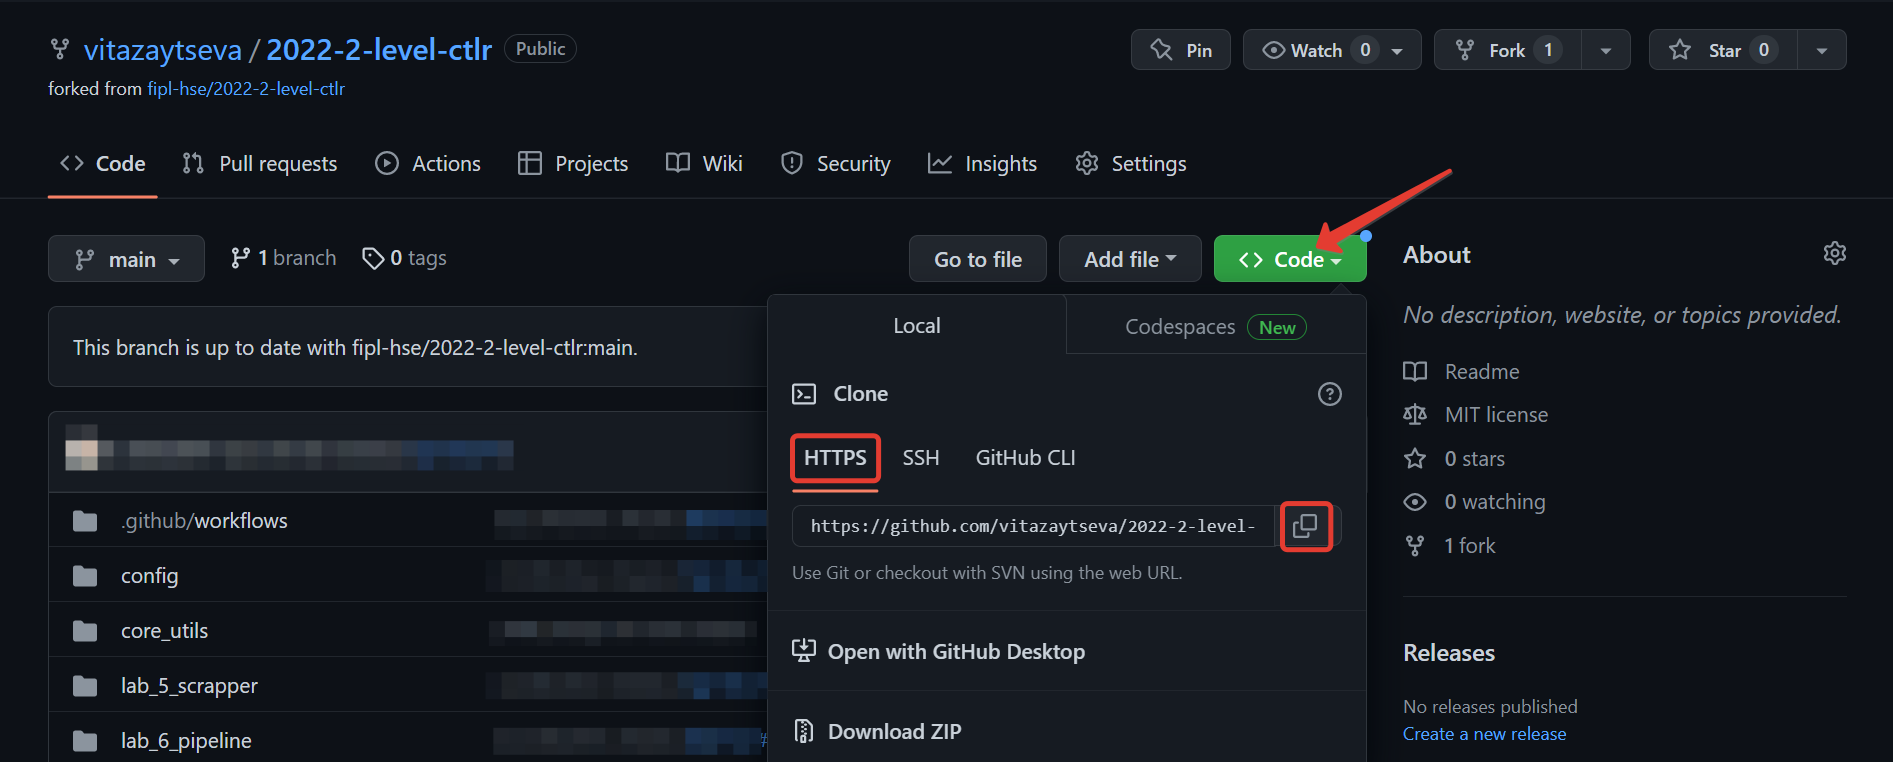
Open a terminal and navigate to a convenient folder.
To move from folder to folder in the terminal, use the command
cd <folder-name>If you do not know how to open a terminal, go to the Open a terminal step.
Run
git clone <link-to-your-fork>to clone the repository. For example,git clone https://github.com/vitazaytseva/2022-2-level-ctlr.git.NB: If asked for a password, enter your Personal Access Token.
Create a project in Visual Studio Code development environment
To create a project in the Visual Code development environment to work with your fork, follow these steps:
Open Visual Studio Code and press
Open: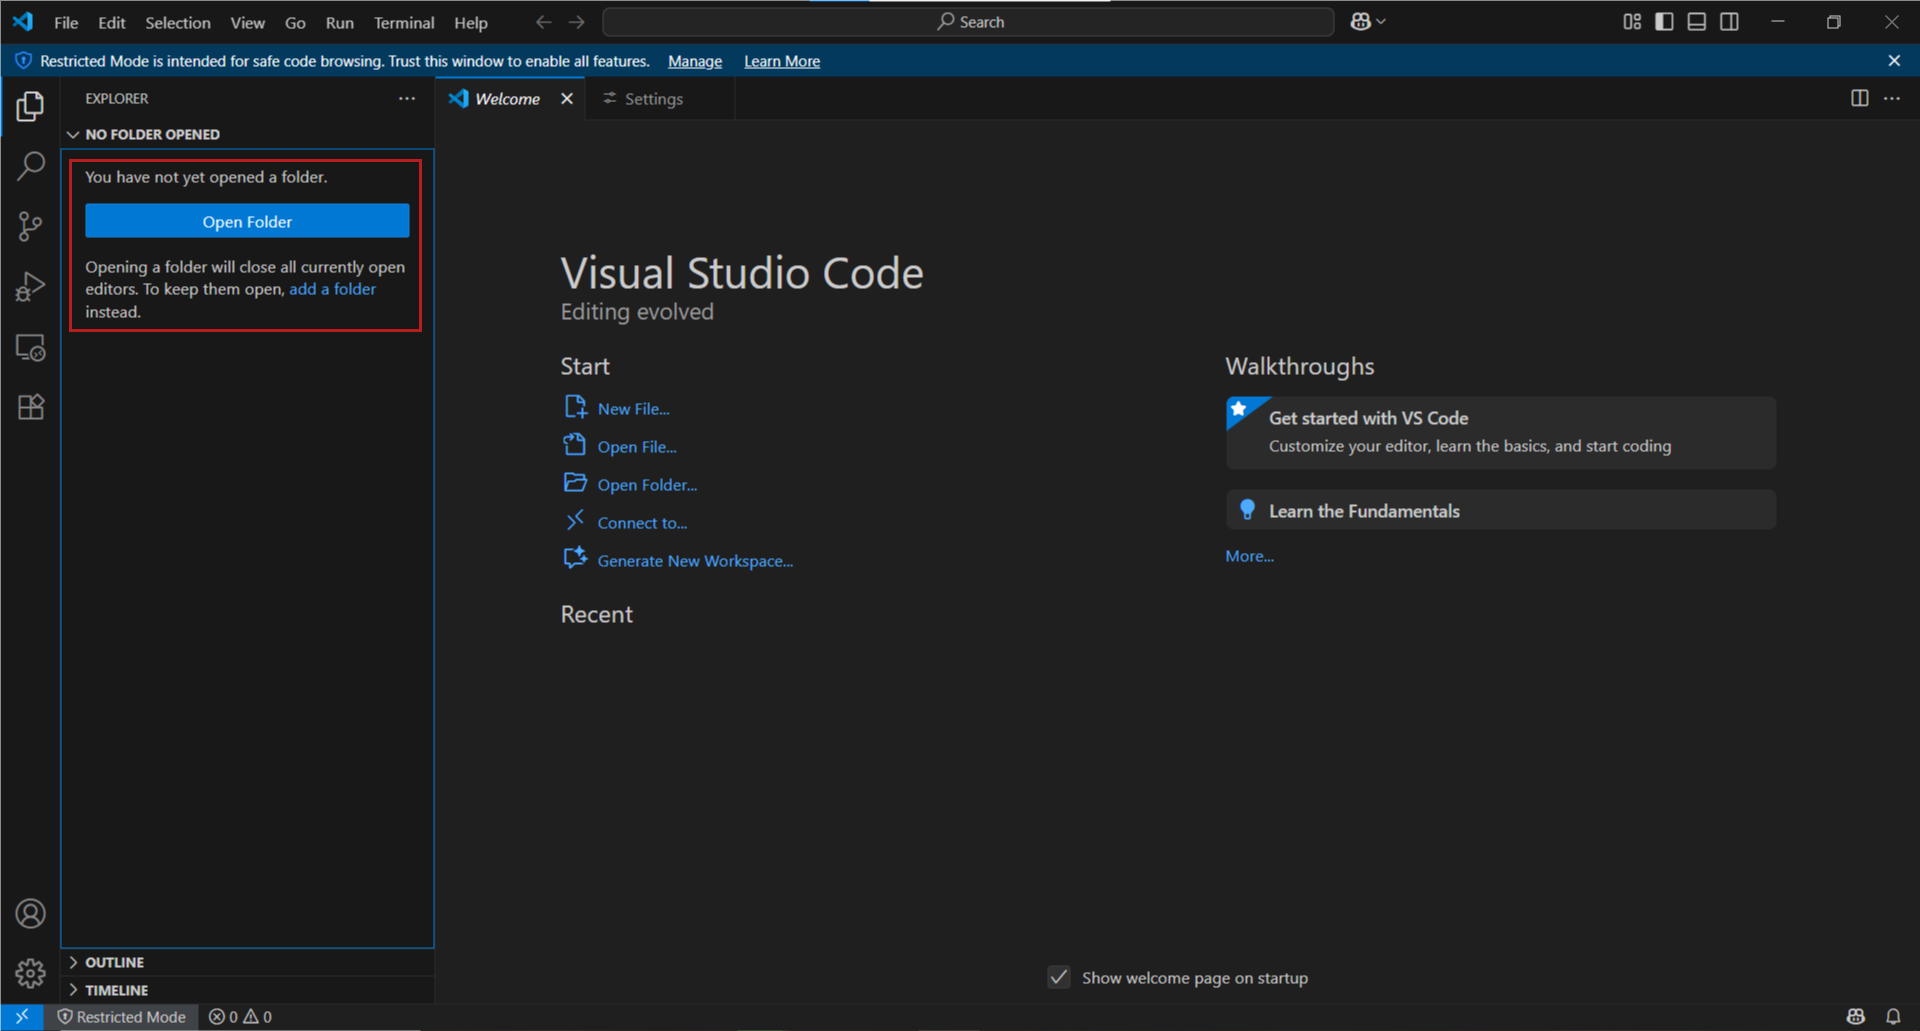
In the opened tab choose the fork folder:
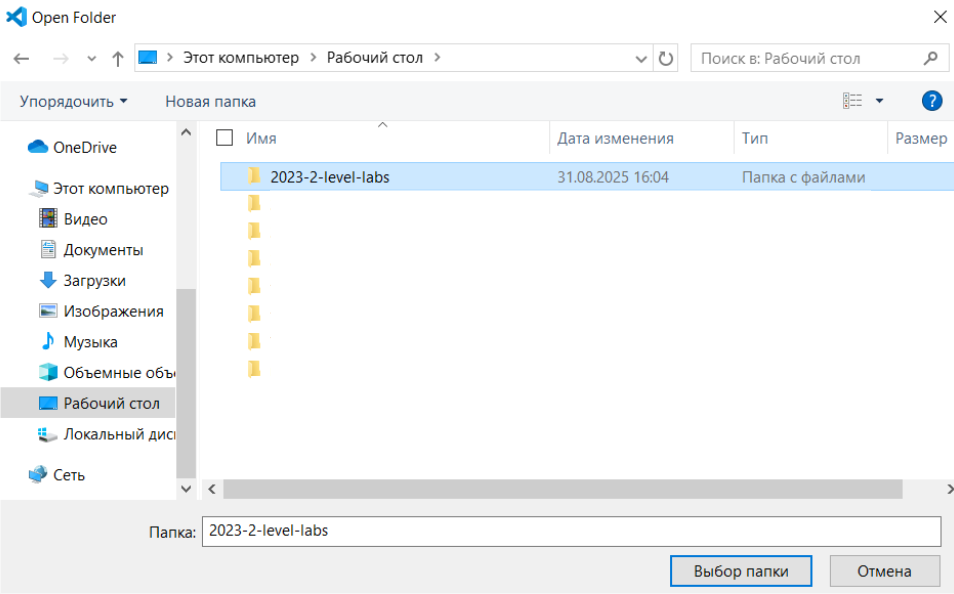
Note
You can see in the screenshot that the fork was cloned to
folder Desktop (Рабочий стол).
Important
You must choose the fork folder, which has the
name format 202X-2-level-ctlr, not the folder with
a laboratory work, like lab_5_scraper.
In the pop-up window click
Yes, I trust the authors: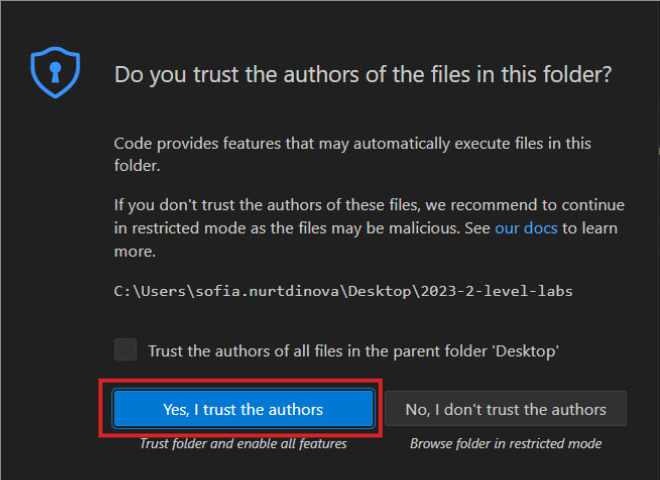
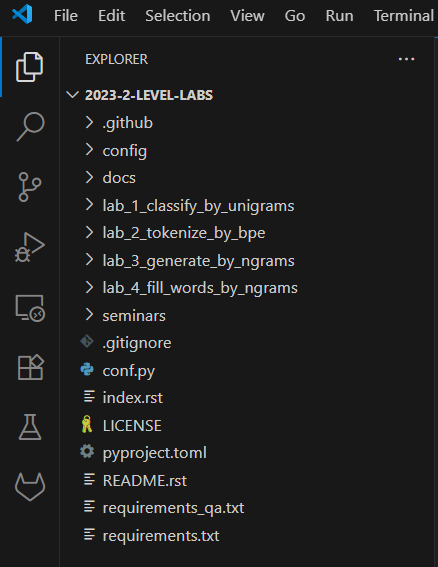
Your project has been created. On the left you can see the project files:
Using the settings icon
 at the bottom left corner
or keyboard shortcut
at the bottom left corner
or keyboard shortcut Ctrl + Shift + Popen the command palette: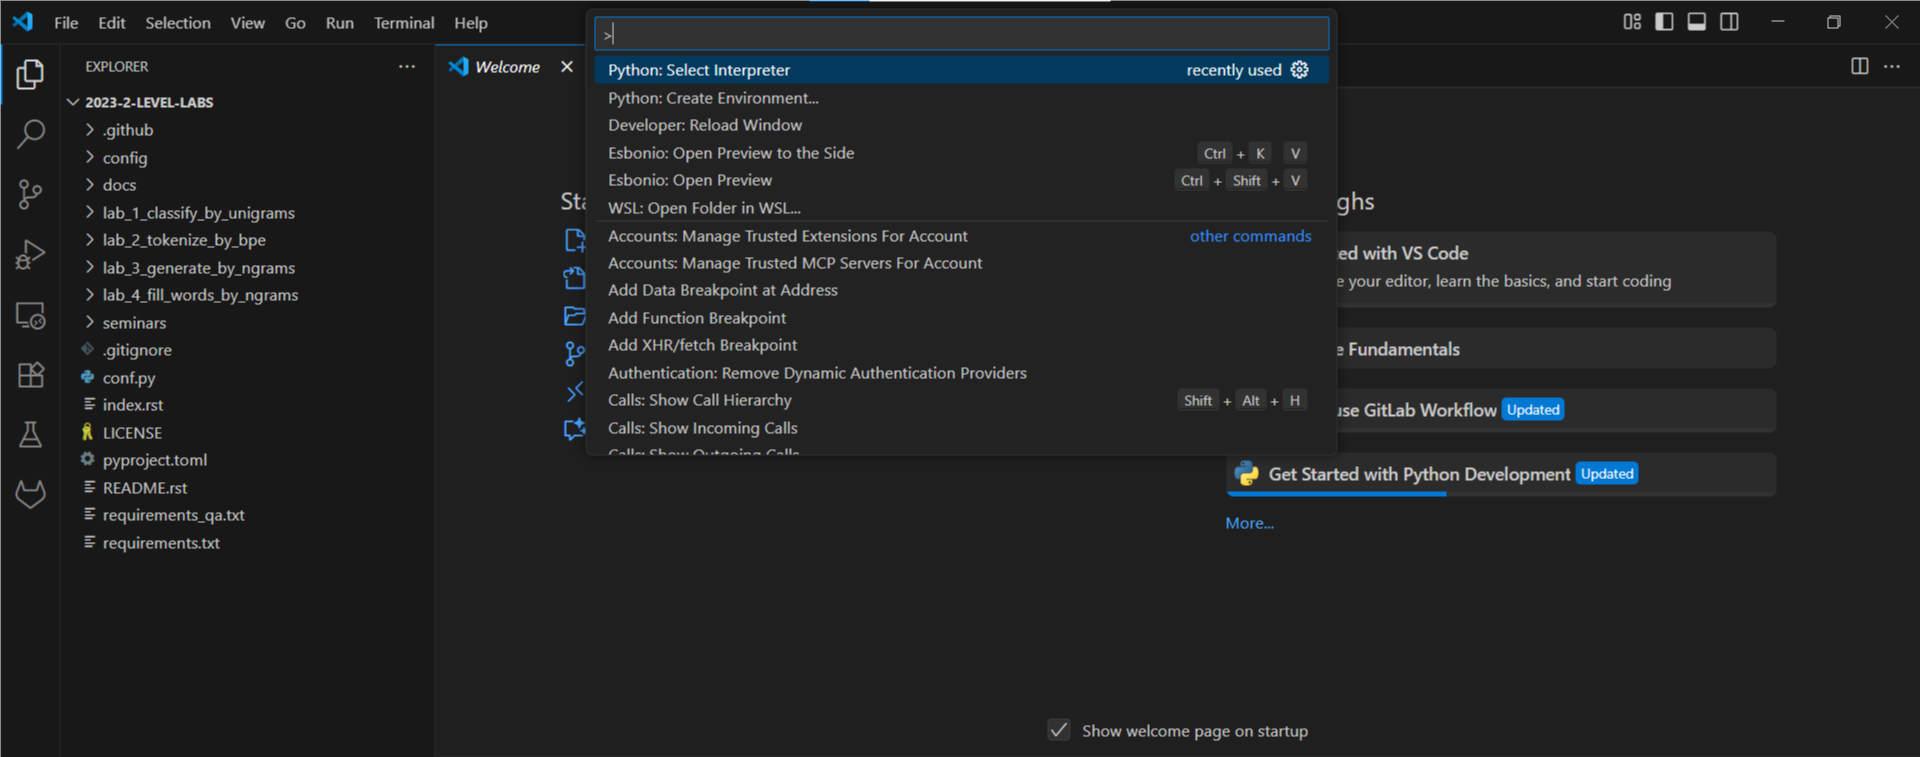
To create virtual environment, type in
Python: Create Environment, then chooseVenvoption: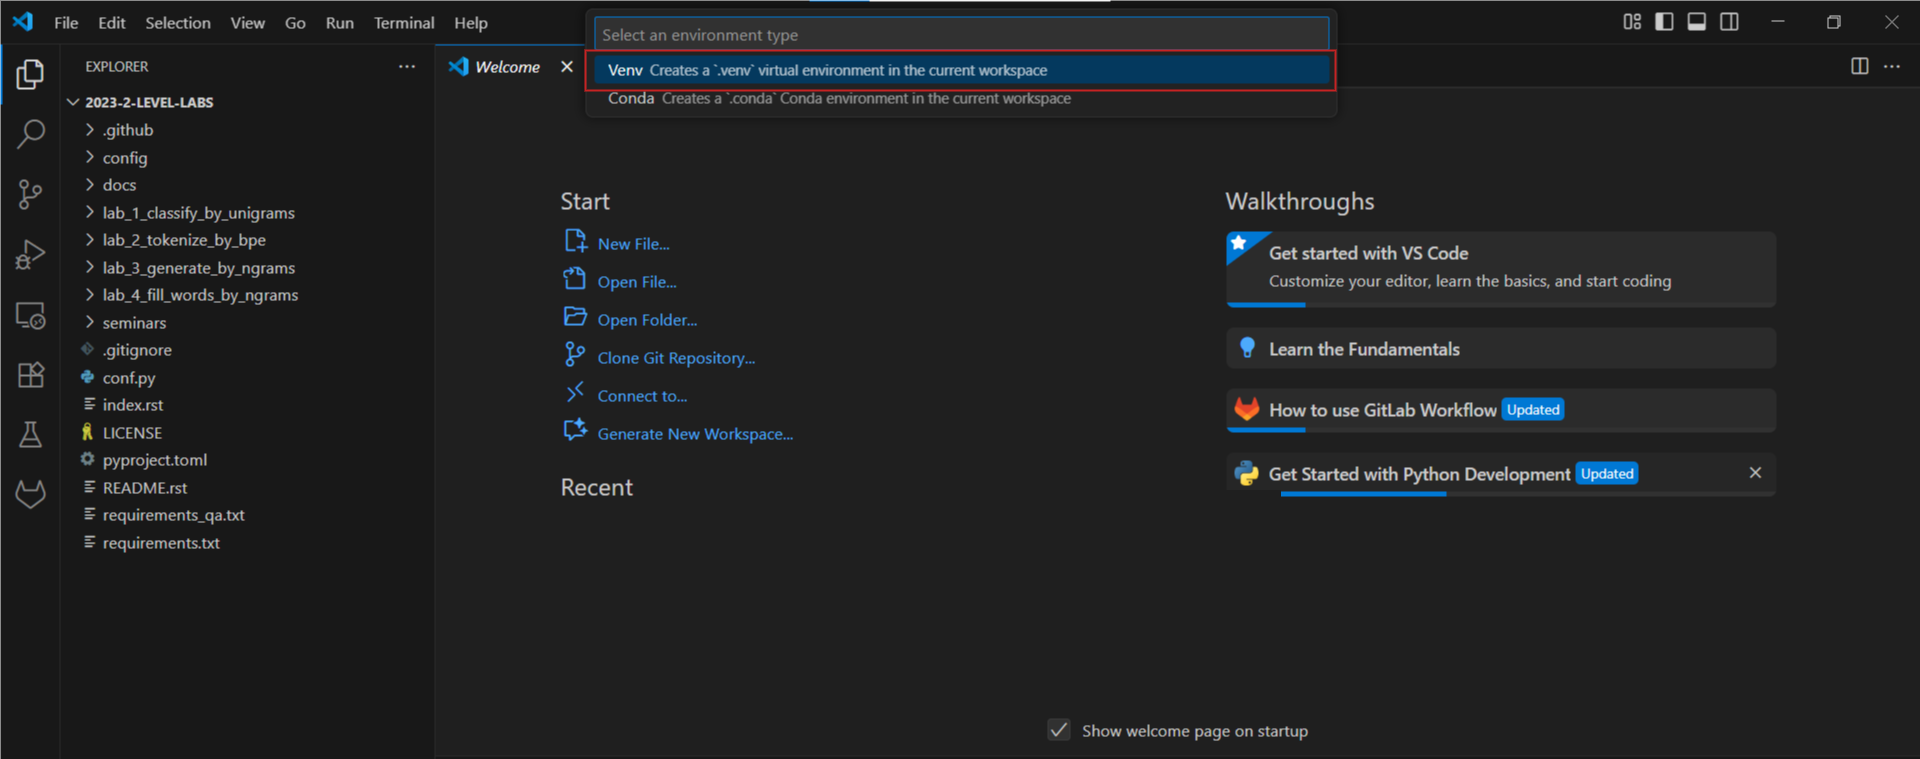
Enter the path to the interpreter you will be using.
To activate your virtual environment open the Visual Studio Code terminal by clicking
Terminal->New Terminalat the top bar of the IDE or with a keyboard shortcutCtrl + `.Run the following code:
python -m venv venv
You have created a project!
Note
To run Python scripts you must install
Python extension. Open the Extensions tab on the
left tab bar (Ctrl+Shift+X).
Type in the extension ID: ms-python.python.
Install it.
Attention
Visual Studio Code does not save changes in files automatically,
but there is auto-saving available. To enable it, click
File -> Auto Save at the top left corner of the IDE.
Now that you have enabled it, it is not active yet. To control its
behaviour, you must set up auto-saving mode in the settings.
Use the keyboard shortcut Ctrl + , or use the settings icon
-> Settings in the bottom left corner. Then,
type in Auto save in the search box field and choose the
mode you would like to use.
You can find more information about auto save modes in the
official Visual Studio Code documentation
Modify source code and push changes to remote fork
You will work on different files in each lab folder. The process looks like this:
You change the source code in the file.
You commit changes using the
gitversion control system.You push changes to a remote fork.
Change the source code
By default, functions do not have implementations - only pass in the
function body. Your task is to implement functions according to the
provided lab description.
Commit changes
Git is a version control system that allows developers to save and track changes to project files at once.
To commit the changes, follow these steps:
Open the Visual Studio Code terminal by clicking
Terminal->New Terminalat the top bar or with the keyboard shortcutCtrl + `: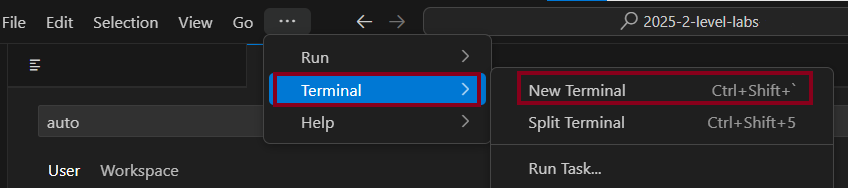

Run
git add <laboratory-work-path>/<laboratory-work-name>.py.In CTLR course you are implementing
scraper.pyandpipeline.pyas the laboratory works, andmain.pyas the final project.
Run
git commit -m "message":
Note
As a commit message it is recommended to use short
description of the changes you have made. The message will
be displayed publically in your fork and Pull Request!
For more information about git commands refer to the official Git documentation.
Push changes to remote fork
After the previous step the changes are in a committed state. They are stored only in your system. To send them to a remote fork, follow these steps:
Open the Visual Studio Code terminal by clicking
Terminal->New Terminalat the top bar or with the keyboard shortcutCtrl + `:
Run
git pull.Run
git push: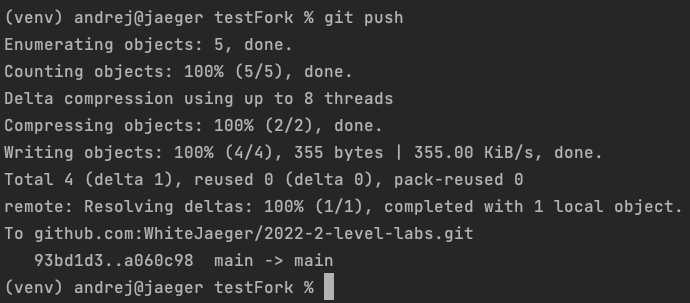
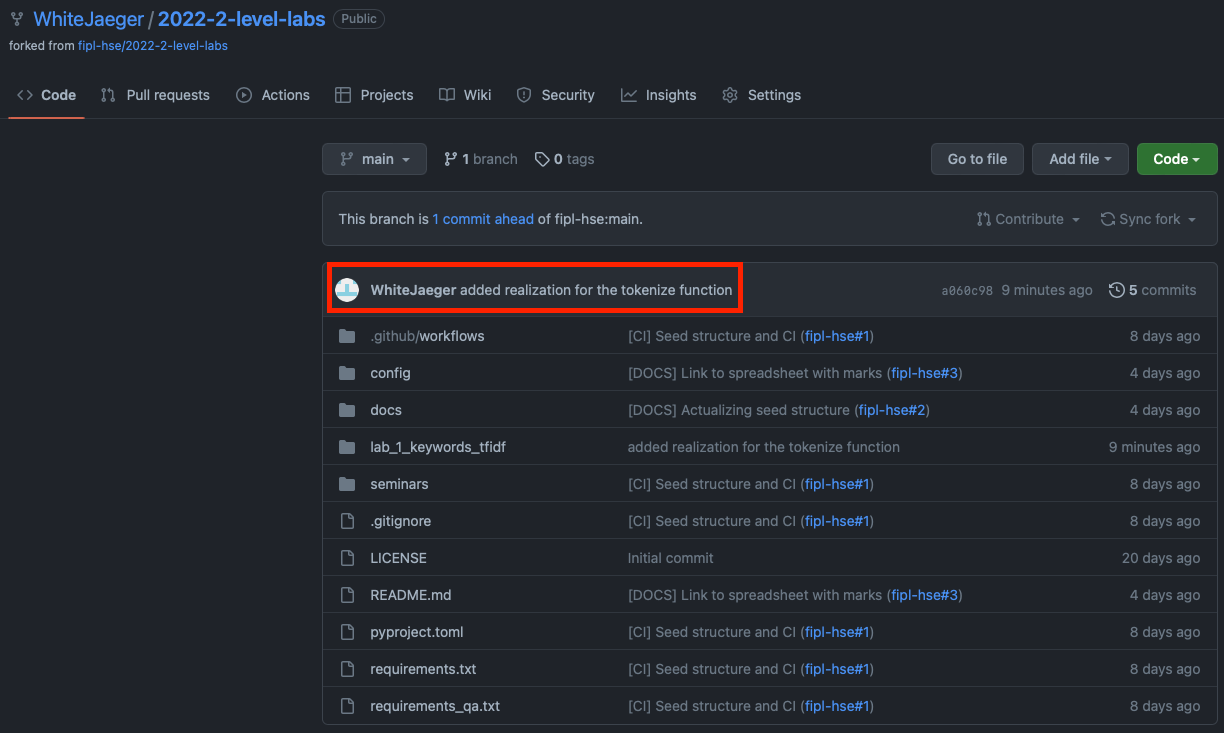
Open the main page of your remote fork.
NB: You will see the commit and the message you wrote.
More information about the commands described above can be found in the official Git documentation.
Create a Pull Request
You need to create a Pull Request on GitHub, so mentors can review your changes and validate. To do this, follow these steps:
Open the repository site that your lecturer sent you.
Select
Pull Requests.
Click
New pull request.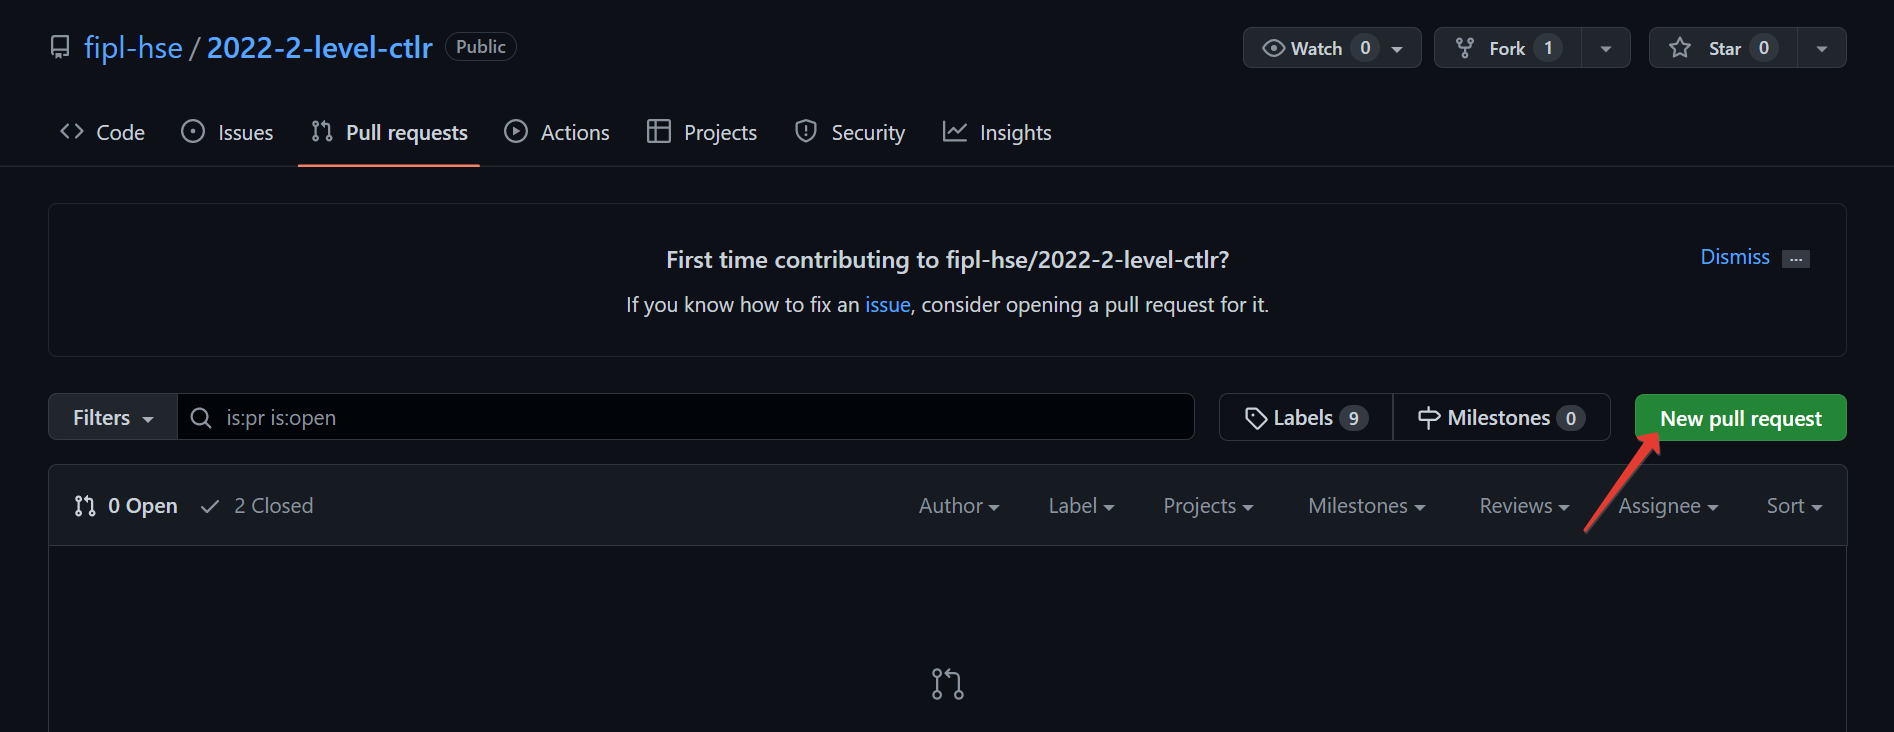
Click
compare across forks.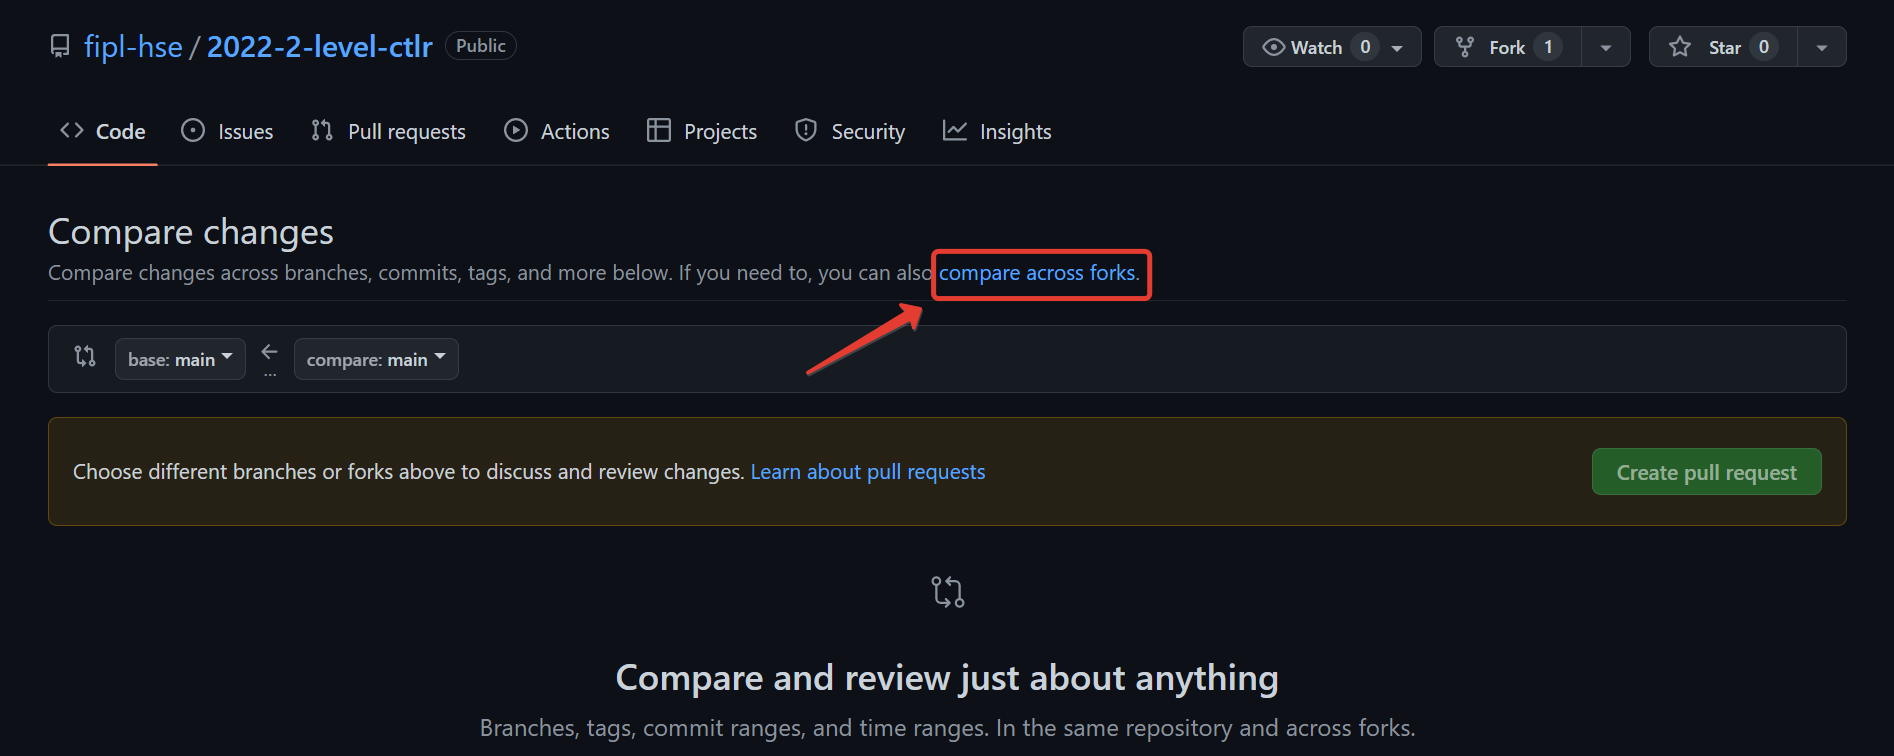
Click
head repositoryand select your fork from the list (it contains your GitHub username).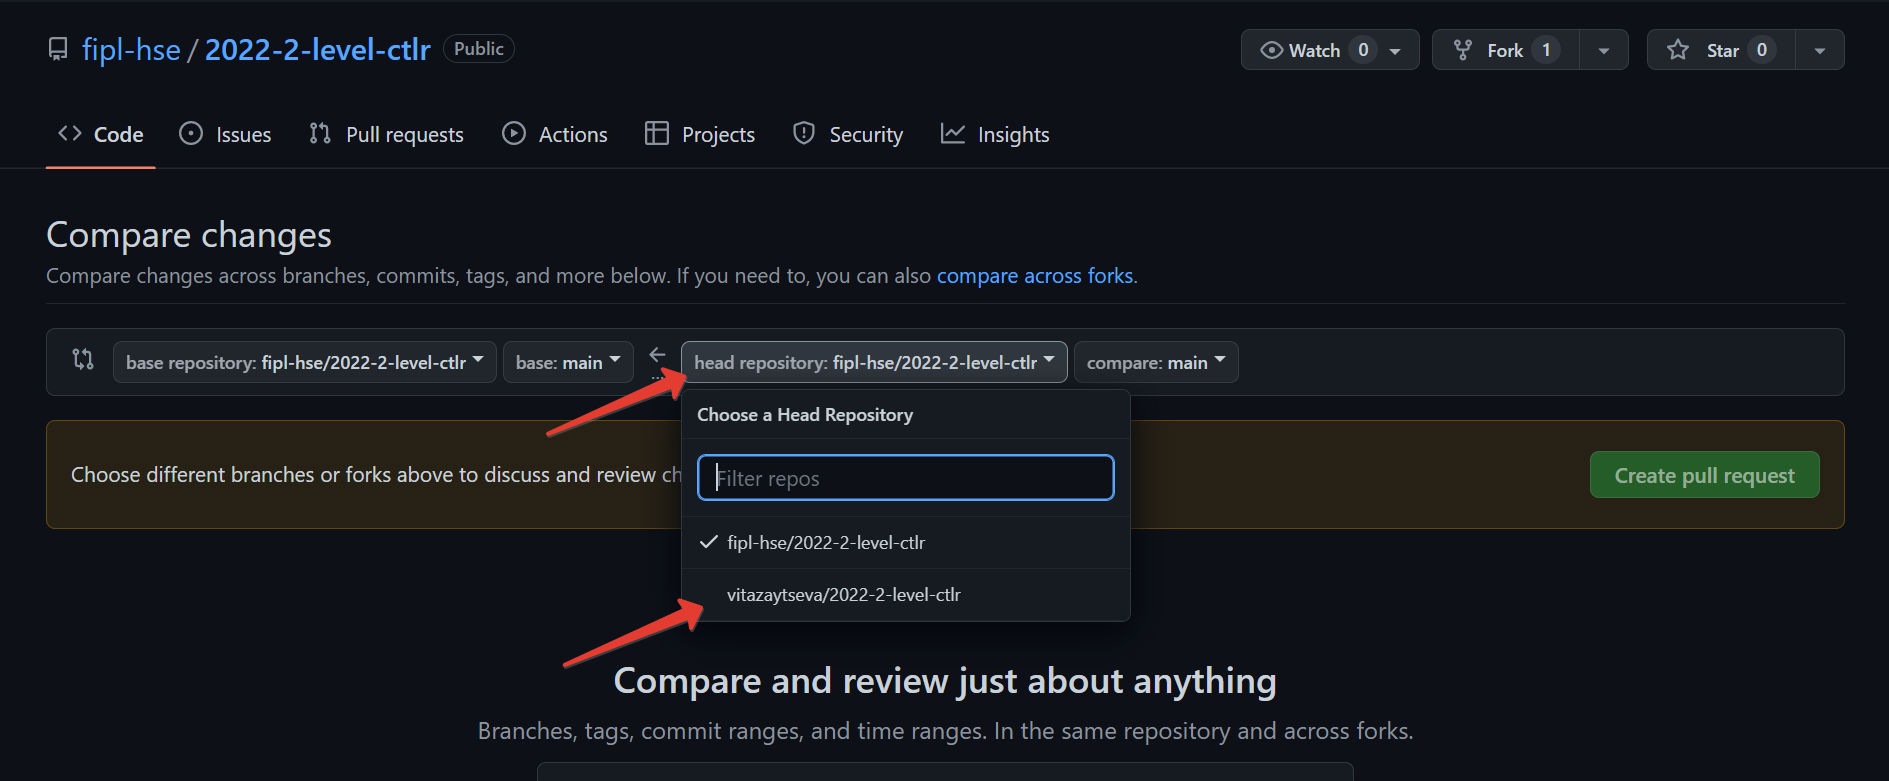
Click
Create pull request.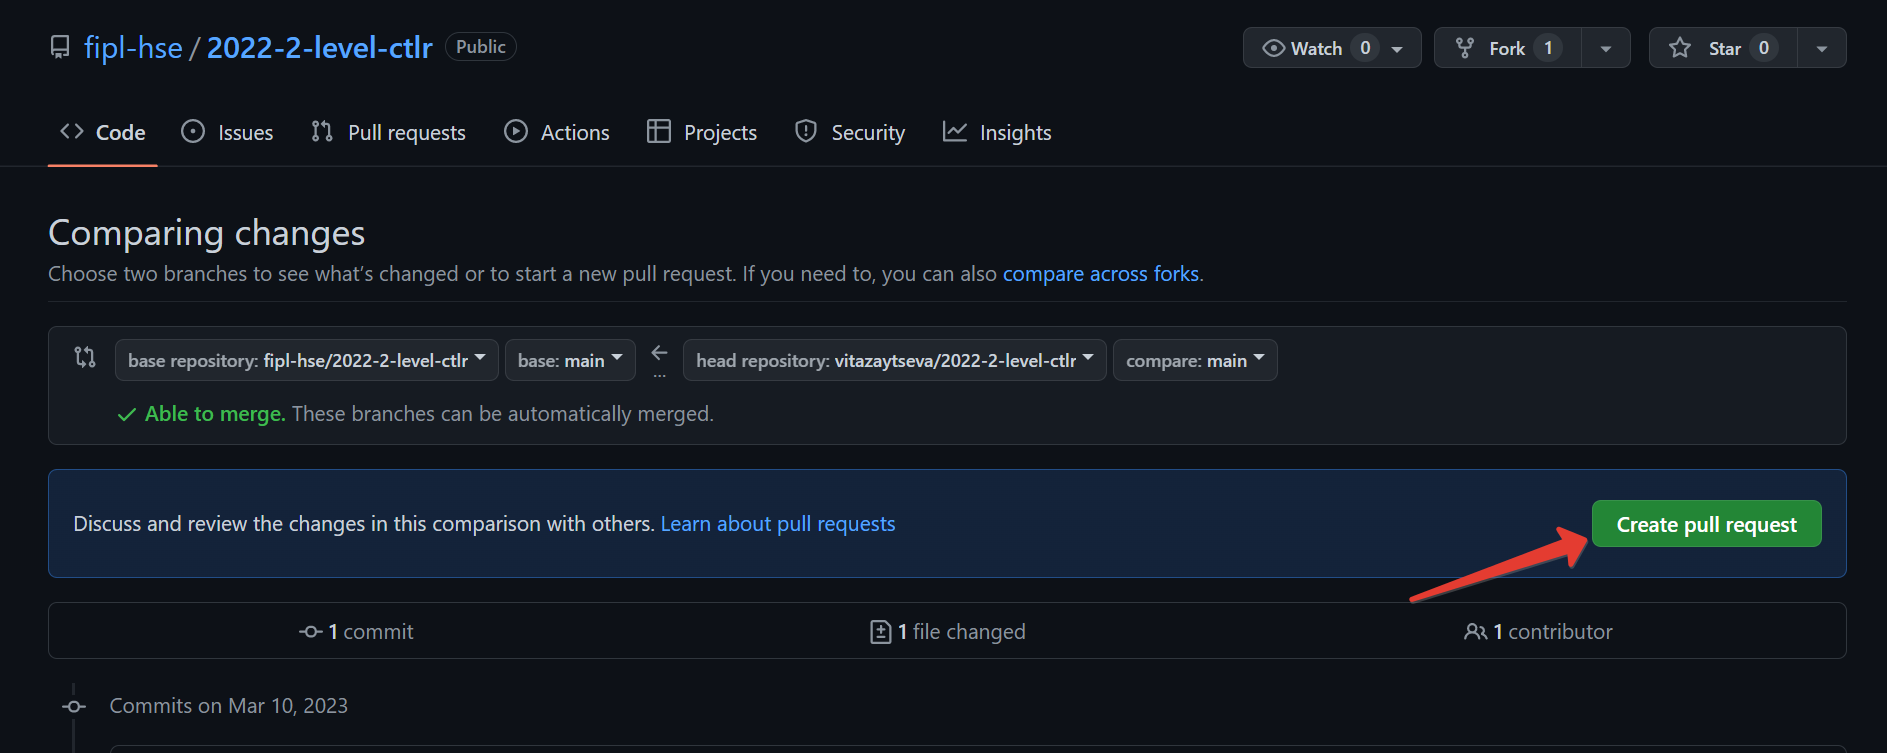
Enter a name for the Pull Request.
NB: The Pull Request name for Lab 5 must match the pattern:
Scraper, Name Surname - 2XFPLX.NB: The Pull Request name for Lab 6 must match the pattern:
Pipeline, Name Surname - 2XFPLX.
NB: The Pull Request name for Final Project must match the pattern:
[PROJECT] Final Project, Team N Surname - 2XFPLX.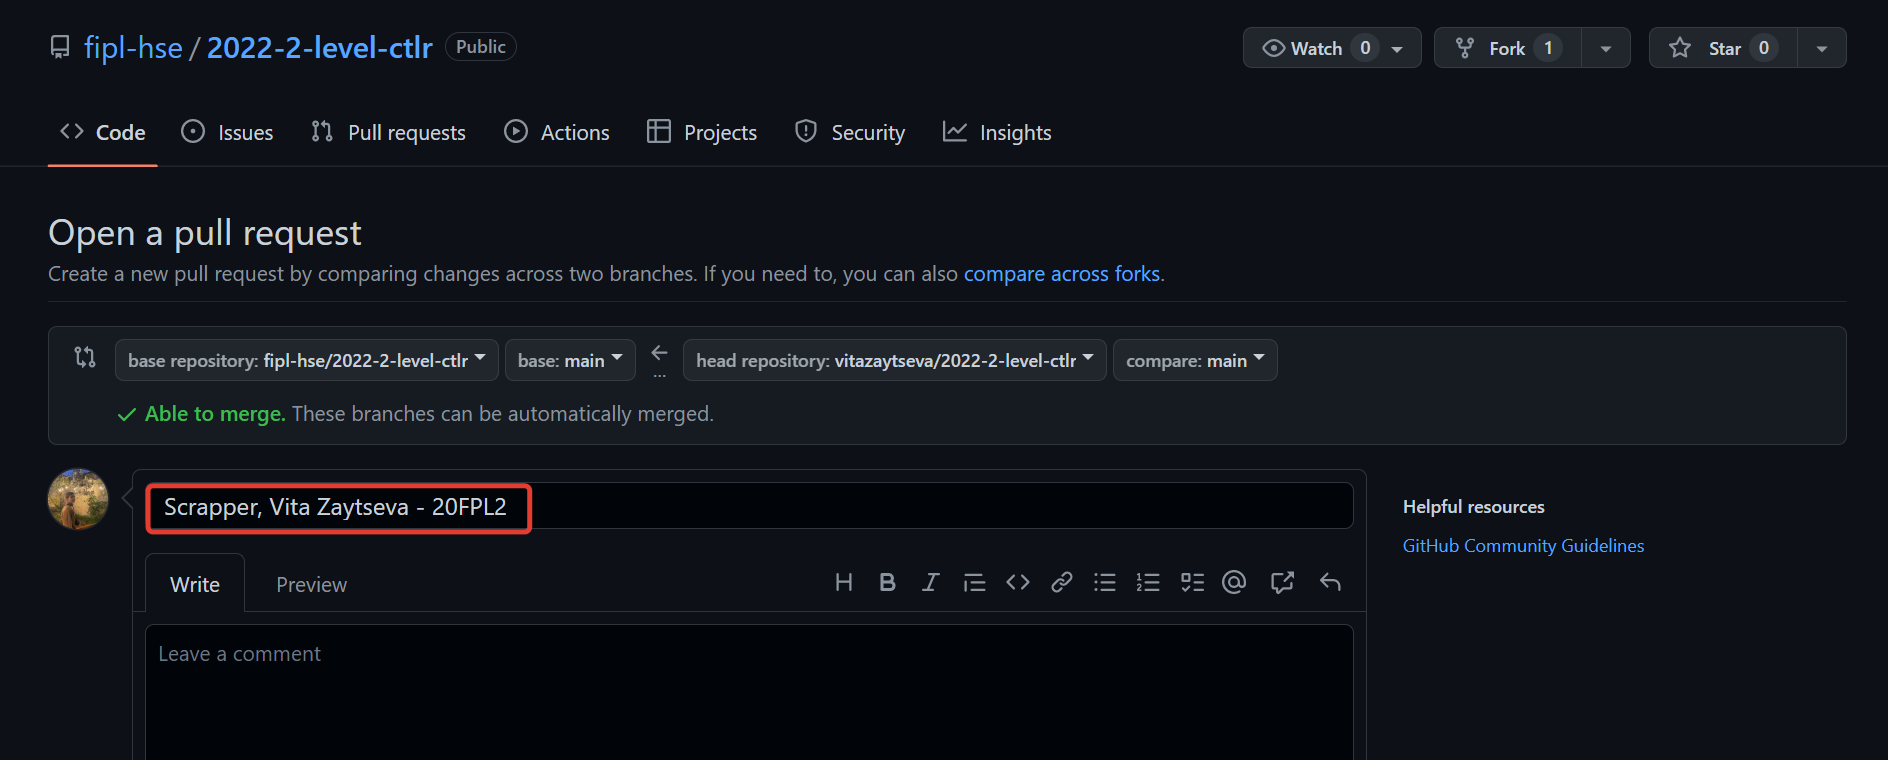
Click
Assigneesand select your mentor from the list.NB: You can find your mentor in the progress sheet.
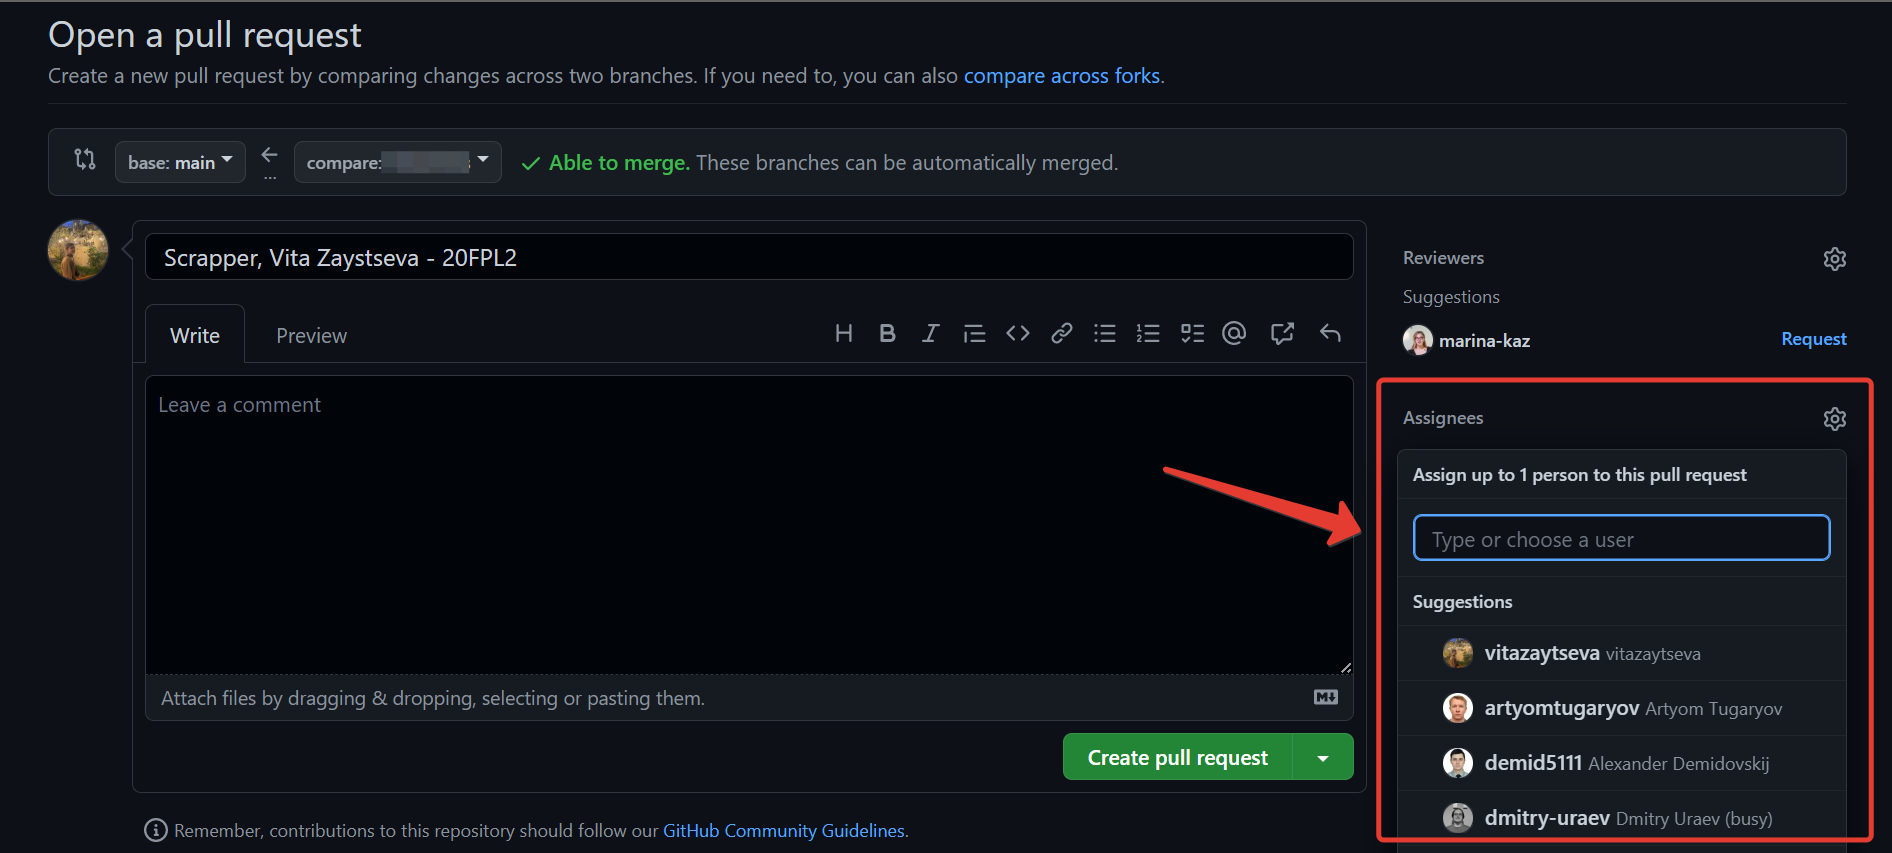
Click
Create pull request.NB: Your Pull Request will appear in the Pull Requests.
Continue working
Your work consists in repeating the following steps:
You push changes to a remote fork.
They will automatically be updated in the Pull Request you created.
The mentor reviews your code and leaves comments.
You correct the source code according to the comments.
See step #2.